 ultimate-guide
How to Inspect Sportfish Yachts: A Buyer's Guide
Table of Contents
- Why a Sportfish Inspection Demands More Than a Walkaround
- Step 1: Review Service Records and Engine Hours First
- Step 2: Assess Hull Integrity and Structural Condition
- Step 3: Inspect Mechanical Systems and Engine Room
- Step 4: Evaluate the Cockpit, Tower, and Fishing Features
- Step 5: Follow Sportfish Yacht Sea Trial Procedures
- Step 6: Check Electronics, Electrical, and Safety Systems
- The Marine Survey Checklist for Sportfish Owners
- Frequently Asked Questions
Last Updated: September 6, 2026
Why a Sportfish Inspection Demands More Than a Walkaround
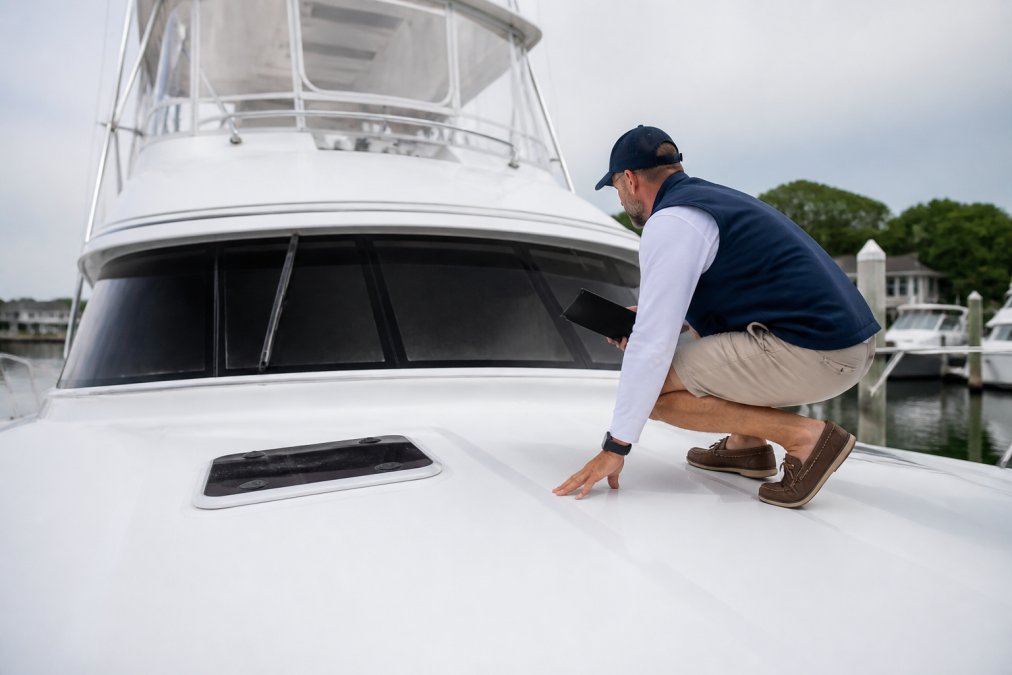
Sportfish yachts absorb punishment that most pleasure craft never see. Decades of running hard to offshore canyons, backing down on fish, and idling through corrosive saltwater create failure points that hide beneath the gelcoat. A serious inspection requires a systematic mechanical and structural evaluation.
The difference between a sound investment and a costly repair project almost always shows up in the same places. This guide walks through the six critical inspection phases in the order a professional should follow.
Step 1: Review Service Records and Engine Hours First
The mechanical history tells you more than the exterior condition ever will. Request the complete maintenance log and service records before you step aboard. Look for documented oil changes at the manufacturer's recommended intervals, transmission service, and cooling system maintenance. Sporadic or missing records are a red flag that should lower your offer.
Engine hours matter, but context matters more. A boat with 800 hours of careful offshore cruising can be healthier than one with 300 hours of hard trolling and repeated WOT runs. Check the hour meter readings against the service log and ask whether the engines have ever been overhauled or replaced.
Step 2: Assess Hull Integrity and Structural Condition
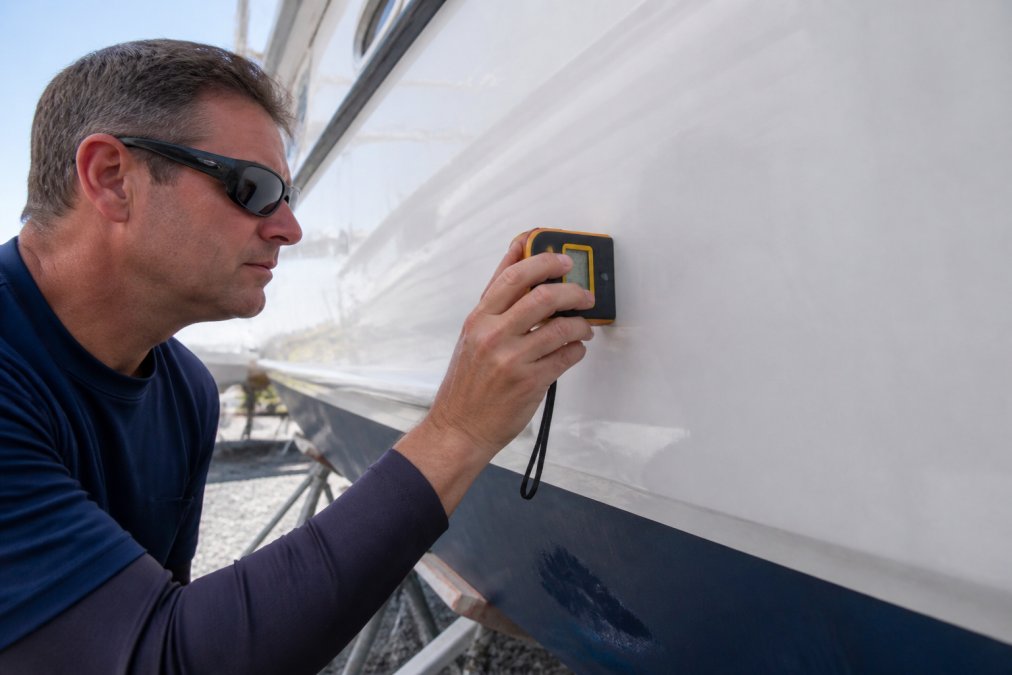
Hull integrity is the backbone of the entire inspection. Start with a visual sweep for gelcoat stress cracks, spiderwebbing, or impact damage, then bring in a moisture meter to detect fiberglass delamination and water absorption below the waterline.
Pay particular attention to the transom, where outboard and sterndrive mounts create constant stress. Look for flexing, cracking, or signs of previous repair work. Check thru-hull fittings for corrosion and verify that each seacock operates smoothly and closes fully. The hull-to-deck joint deserves scrutiny as well.
The Saltwater Corrosion Deep Dive
Sportfish yachts live in a uniquely corrosive environment. The combination of high-performance metals, constant saltwater immersion, and stray electrical currents creates a galvanic corrosion risk that can quietly destroy a hull or running gear. A proper inspection must include a systematic corrosion analysis.
Start with the sacrificial anodes. On a sportfish, you will typically find zinc anodes on the propeller shafts, rudders, trim tabs, and hull. Check that they are more than 50% consumed; if they are completely gone, the underlying metal has been sacrificing itself. Look for the correct alloy, zinc for saltwater, aluminum for brackish, and confirm the anodes are properly bonded to the shaft and rudder system.
Next, test the bonding system. Every underwater metal component, shafts, rudders, thru-hulls, strainers, and the engine block, should be tied into a common bonding wire that leads to the anode. Use a multimeter set to DC volts to measure the potential between the anode and a reference electrode (a silver/silver chloride half-cell is standard). A reading between -900 and -1100 millivolts indicates adequate protection; anything more positive suggests the boat is under-protected and corrosion is occurring (boatus.com).
Inspect for stray current corrosion, which occurs when faulty wiring leaks DC current into the water. This type of corrosion is fast and aggressive, often pitting stainless steel shafts or rudders within months. Look for signs of pitting on the propeller, shaft, and rudder blades, small, crater-like depressions that indicate active corrosion. Also check the shore power system.
Finally, examine the underwater metals themselves. On outboard-powered sportfish, check the lower unit housing for pitting or blistering, and inspect the propeller for electrolysis damage. On inboard boats, pay special attention to the rudder posts and shaft logs, where crevice corrosion can hide. White, chalky deposits around fittings signal active corrosion.
Step 3: Inspect Mechanical Systems and Engine Room
Modern sportfish engines are computer-controlled, which means a physical inspection alone is insufficient. Digital diagnostic tools can read the engine ECU for fault codes, historical over-rev events, and actual operating hours that may differ from the dash display. A compression test and leakdown test reveal cylinder health and valve sealing.
Work through the engine room methodically. Check the raw water cooling system for scale buildup and impeller condition, examine belts and hoses for dry rot, and verify that the bilge pumps activate automatically. Inspect the propeller shaft alignment and the cutlass bearing for wear. The lower unit on outboard-powered boats requires its own inspection.
Bringing the Right Digital Tools to the Engine Room
A serious buyer should not rely on the dash hour meters alone. Modern sportfish engines, whether from Caterpillar, MTU, MAN, Volvo Penta, or Yamaha, store a wealth of data in their ECUs that can reveal the engine's true history. Before you step aboard, research the specific engine model and download the manufacturer's diagnostic software to your laptop.
For common engine packages, here is what to bring:
- Caterpillar Electronic Engines: Use Caterpillar Electronic Technician (Cat ET) software with a communication adapter that plugs into the engine's data link. Cat ET can read fault codes, logged events, and total engine hours. It also shows the number of cold starts, which can indicate excessive idling or short-run operation.
- MTU Series 2000/4000: MTU engines use the MTU Diagnosis system, which requires a laptop with the MTU USB adapter. This system can read active and stored fault codes, as well as historical operating data such as maximum RPM and load percentages.
- MAN Common Rail Engines: MAN engines use MAN CATS (Computer Aided Troubleshooting System) software. The system can read fault codes and also provides a detailed history of engine events, including over-rev and high-temperature alarms.
- Volvo Penta (Inboard or IPS): Volvo Penta uses VODIA or the newer Easy Connect interface. These tools can read engine hours, fault codes, and service reminders. For IPS systems, you can also check the drive's oil level and any historical alarms.
- Yamaha Outboards: Yamaha outboards use the Yamaha Diagnostic Tool, which connects via a cable to the engine's diagnostic port. It reads fault codes, engine hours, and even the number of starts. You can also check the engine's maximum RPM achieved, which is useful for verifying over-rev events.
When you connect the diagnostic tool, look for the following:
- Fault Codes: Active codes are immediate red flags. Stored codes may indicate past issues that were cleared but not fixed. Note the code and research what it means; some codes are benign, but others, like overheat or low oil pressure, are serious.
- Engine Hours: Compare the ECU hours to the dash hour meter. Discrepancies of more than 5% suggest tampering or a faulty gauge. The ECU hours are the authoritative source.
- Over-Rev Events: Many ECUs log the maximum RPM and the duration of any over-rev. A single brief over-rev may be acceptable, but repeated or prolonged over-rev events can damage valves and pistons.
- Service History: Some ECUs store service reminders or logs of recent maintenance. This can corroborate the paper records.
Do not stop at the digital check. Perform a physical compression test on each cylinder. A healthy diesel engine should show compression within 10% across all cylinders; a greater variance indicates worn rings or valves (dieselnet.com). A leakdown test pinpoints where compression is escaping, past the rings, valves, or head gasket.
Finally, take an oil sample from each engine and send it to a lab for analysis. A basic kit costs around $50 and can detect coolant, fuel, or metal particles that indicate internal wear (noria.com). Oil analysis is the single best predictor of engine health.
Step 4: Evaluate the Cockpit, Tower, and Fishing Features
The cockpit is where a sportfish earns its keep, and its condition reflects how the previous owner treated the boat. Examine the cockpit layout for stress cracks around the rod holders, live well, and transom door. Check the covering boards and gunwale padding for wear. Open and close every hatch and locker to confirm the gaskets seal properly.
The tuna tower and bridge structure deserve special attention, since these are the most vulnerable components on the boat. Inspect every weld joint and fastener on the tower for corrosion cracking, and check the rigging and helm station for secure mounting. A loose tower is a safety hazard at sea.
Step 5: Follow Sportfish Yacht Sea Trial Procedures
A sea trial is the only way to verify vessel performance under load. Sportfish yacht sea trial procedures should include a full throttle run to confirm the engines reach their rated RPM range, a slow-speed handling check, and a backing-down maneuver to simulate fighting a fish. Watch the gauges throughout for oil pressure, coolant temperature, and voltage stability.
Listen for abnormal noises from the engines and drivetrain. Vibrations at speed can indicate propeller damage, shaft misalignment, or engine mounting issues. Test the steering system through its full range and verify that the trim tabs respond correctly.
Step 6: Check Electronics, Electrical, and Safety Systems
The electronics suite on a modern sportfish represents a significant portion of the boat's value. Verify that every display powers on, the radar rotates and returns a clear picture, and the chartplotter acquires GPS signal. Check the autopilot, VHF radio, and any satellite communication systems.
Inspect the electrical system for proper wiring, secure connections, and evidence of previous modifications. Heat-shrink connectors and labeled circuits indicate professional work; twisted wires and electrical tape suggest the opposite. Check the battery condition and the charging system output. Verify that all safety equipment is present, current, and properly mounted.
The Marine Survey Checklist for Sportfish Owners
A marine survey checklist for sportfish buyers consolidates every inspection point into a single document you can reference during the walkthrough. The checklist below covers the highest-risk areas that demand verification before you commit to a purchase.
| Inspection Area | What to Verify | Red Flags |
|---|---|---|
| Service Records | Maintenance log, oil changes, engine hours | Gaps in documentation, mismatched hours |
| Hull & Structure | Moisture readings, transom flex, thru-hulls | Fiberglass delamination, core saturation |
| Engines & Drivetrain | ECU fault codes, compression, shaft alignment | Over-rev history, metal in oil |
| Cockpit & Tower | Weld joints, gaskets, rod holder stress | Corrosion cracking, loose tower mounts |
| Sea Trial | RPM range, temperature stability, vibrations | Slipping transmission, overheating |
| Electronics & Safety | Radar, GPS, EPIRB, fire suppression | Dead displays, expired safety gear |
Hiring a marine surveyor for sportfish vessels is non-negotiable for serious buyers. An independent surveyor works for you, not the seller, and provides a written report you can use both to negotiate the price and to plan post-purchase repairs. Consider hiring a surveyor who specializes in sportfish and has experience with the specific engine package.
The inspection process ultimately comes down to protecting your investment. A thorough evaluation that costs a few thousand dollars can save you tens of thousands in hidden repairs and strengthens your negotiation position.
Buying a sportfish yacht is a significant commitment, and the inspection process determines whether that commitment becomes a source of pride or a cycle of repair bills. At Spencer Christopher Yacht and Ship, our brokers bring real-world experience as USCG captains, engineers, and mechanics to every showing, so you have someone who can spot the problems that listing photos hide. With our complete fiduciary care from first showing to final delivery and an in-house closing department, you get transparent guidance through every phase of the transaction. Get started with Spencer Christopher Yacht and Ship and put a team with over four decades of experience to work protecting your purchase.
Frequently Asked Questions
What are the most common mechanical issues found in used sportfish yachts?
Common issues include corrosion in engine cooling systems, failing lower unit seals, and worn propeller shaft bearings. Look for signs of galvanic corrosion around thru-hull fittings and the electrical bonding system. A leakdown test on the cylinders and an oil analysis can reveal hidden engine problems. Always verify that the maintenance log matches the engine hours, as skipped service intervals often lead to expensive failures.
Why is a professional marine survey essential when buying a sportfish?
A professional survey provides an unbiased assessment of the yacht's condition, which is critical when you inspect sportfish yachts. Surveyors use tools like moisture meters to find fiberglass delamination and gelcoat stress cracks that an untrained eye misses. They also verify structural integrity, safety equipment, and compliance with USCG regulations. This report gives you legal protection and a strong basis for negotiating the final price.
What should you look for during a sportfish yacht sea trial?
During sea trial procedures, focus on vessel performance: check that the hull reaches its expected top speed and planes smoothly. Test the electronics suite, including radar and autopilot, under load. Open and close seacocks, inspect the bilge condition, and listen for unusual noises from the propeller shaft alignment. Monitor engine temperatures and oil pressure to catch overheating or cooling system problems.